Penetration Testing a pfSense Firewall: A Step-by-Step Guide
ARTICLES


Firewalls act as the first line of defense in securing a network, but how do you ensure your firewall is truly secure? In this blog, we’ll dive into penetration testing a pfSense firewall. We’ll explore how to assess vulnerabilities, test firewall rules, and implement strategies to strengthen the network. This hands-on walkthrough will cover reviewing configurations, scanning for vulnerabilities, and applying fixes.
What is Penetration Testing?
Penetration testing, or pen testing, is like a planned drill for your network. By simulating an attack, it helps identify vulnerabilities before a real attacker can exploit them. The process typically involves:
Reconnaissance: Gathering information about the target.
Scanning: Identifying active systems, open ports, and running services.
Vulnerability Analysis: Detecting weak spots that attackers could exploit.
Exploitation: Testing vulnerabilities to assess their impact.
Post-Attack Activities: Fixing vulnerabilities and confirming the network is secure.
Today, we will apply these steps to a network protected by a pfSense firewall.
Reviewing and Testing the pfSense Firewall
The first step in penetration testing is to understand the existing firewall configuration and evaluate its effectiveness.
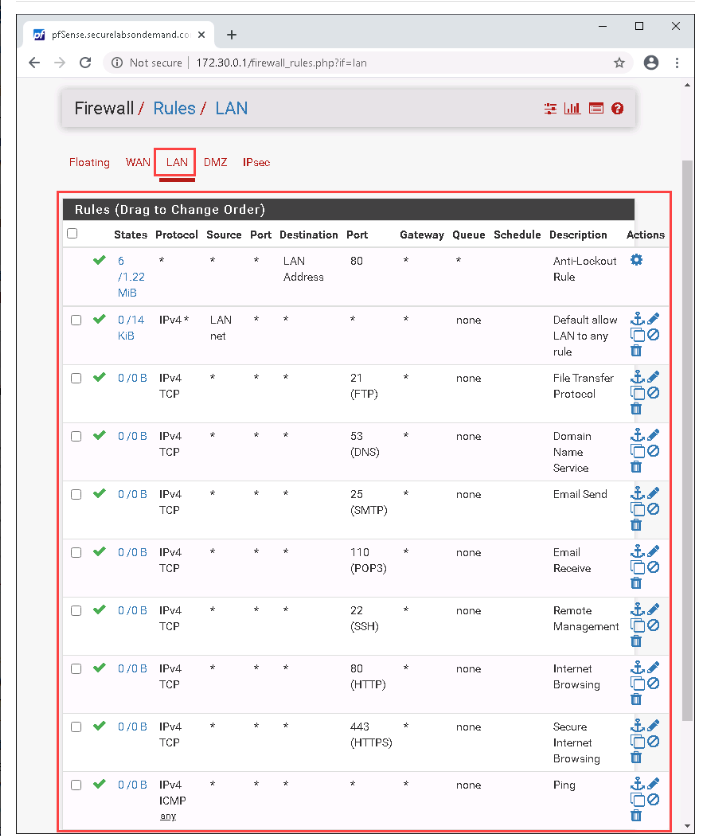
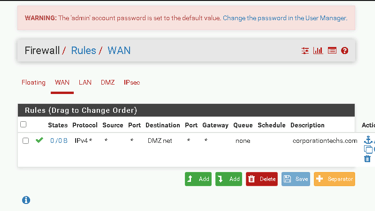
Step 1: Reviewing the Configuration
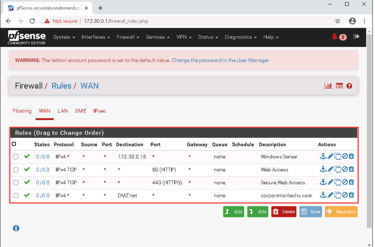
I began by logging into the pfSense Web GUI using its IP address (172.30.0.1). After logging in with the provided credentials (admin/pfsense), I reviewed the following:
Virtual IPs: A virtual IP (202.20.1.3) mapped external traffic to an internal server (172.30.0.15) using 1:1 NAT.
NAT Rules: The NAT configuration forwarded all external traffic to the internal server, exposing it to potential attacks.
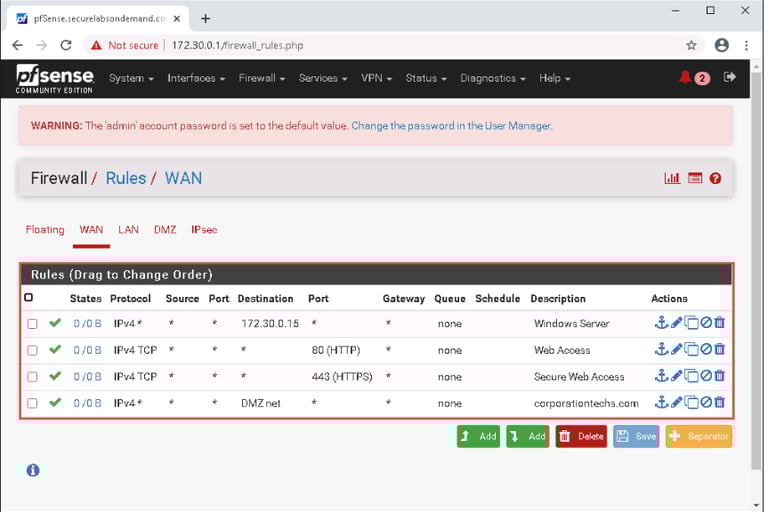
Firewall Rules: The WAN rules allowed unrestricted traffic to the internal server—a significant security risk.

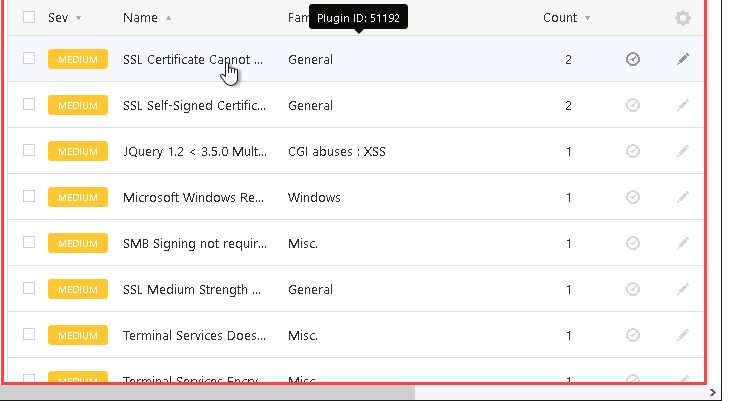
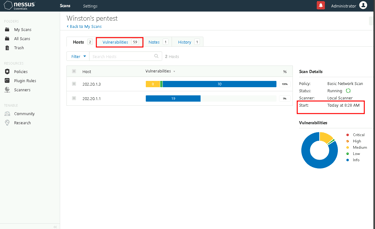
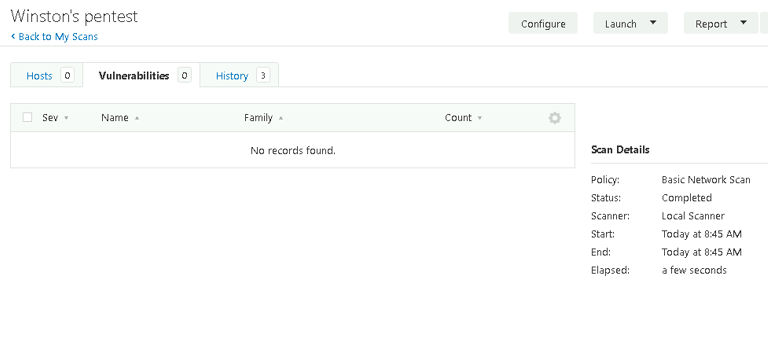
Step 2: Scanning with Nessus
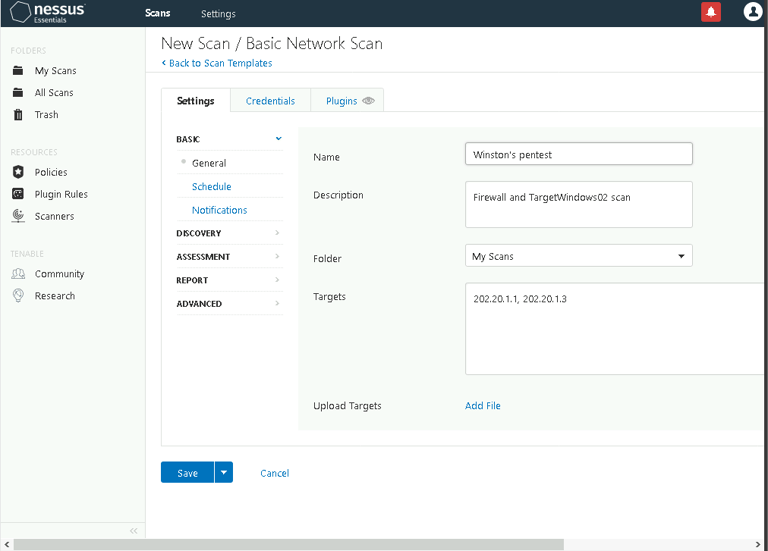
To identify vulnerabilities, I used Nessus, a powerful vulnerability scanner:
Setting Up the Scan: A Basic Network Scan was configured to target the firewall (202.20.1.1) and the internal server (202.20.1.3).
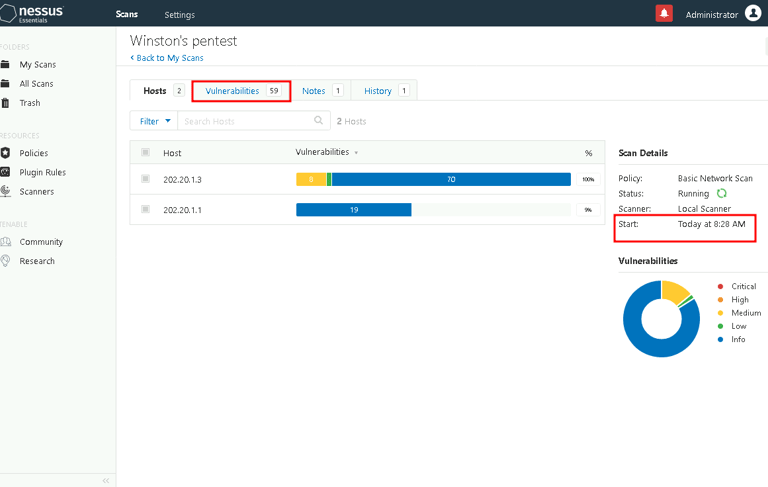
Results: Nessus detected several vulnerabilities, including misconfigurations and unpatched software. Each vulnerability was accompanied by detailed recommendations.
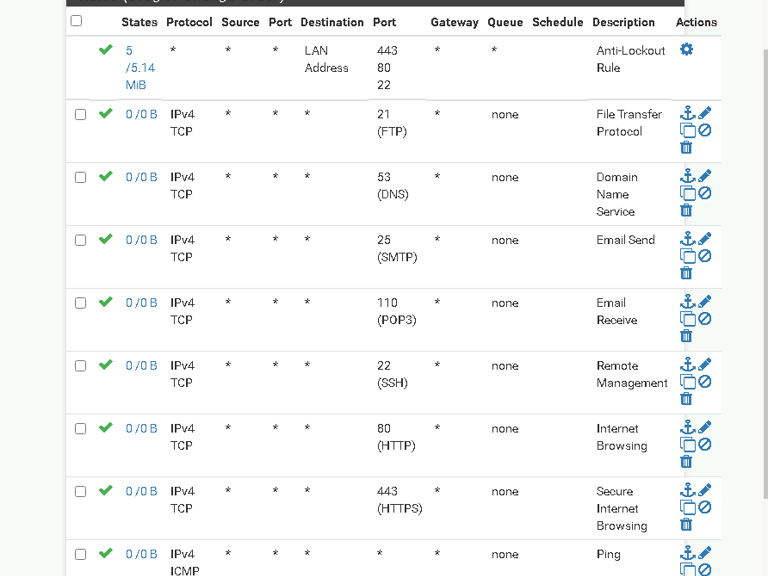
Step 3: Hardening the Firewall
Based on the Nessus results, I took steps to reduce exposure:
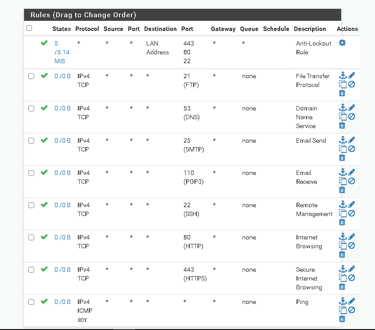
Removed Overly Permissive Rules: The rule allowing all traffic to the internal server was deleted.
Applied Granular Rules: New rules were created to allow only specific traffic, such as HTTPS, while blocking everything else.

Step 4: Validating Changes
After updating the firewall rules, I ran another Nessus scan. The results confirmed that the vulnerabilities had been mitigated, with no critical issues remaining.
Advanced Penetration Testing and Black-Box Testing
In this section i applied what we learned in the first section by performing more advanced tests, simulating a black-box penetration test—a scenario where the tester has minimal knowledge of the target network.
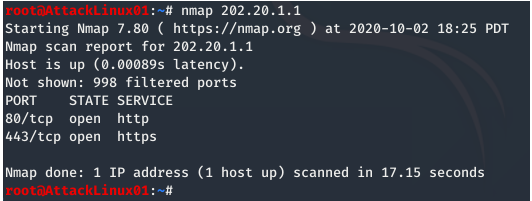
Step 1: Port Scanning with Nmap
I used Nmap, a widely-used network scanning tool, to identify open ports and services:
Basic Scan: A simple scan of the firewall (nmap 202.20.1.1) revealed open ports, including HTTP (80) and HTTPS (443).
Expanded Scan: A broader scan (nmap 202.20.1.1/24) identified additional IP addresses with open ports.
OS Detection: Using the -sV -O flags, we determined that one of the hosts was running a version of Windows Server.
Step 2: Vulnerability Scanning with OpenVAS
To go deeper into vulnerability analysis, I used OpenVAS, an open-source vulnerability scanner:
Configuring the Scan: A Full and Fast Scan was configured to target 202.20.1.3.
Results: OpenVAS detected additional vulnerabilities, including high-severity issues related to outdated software.