
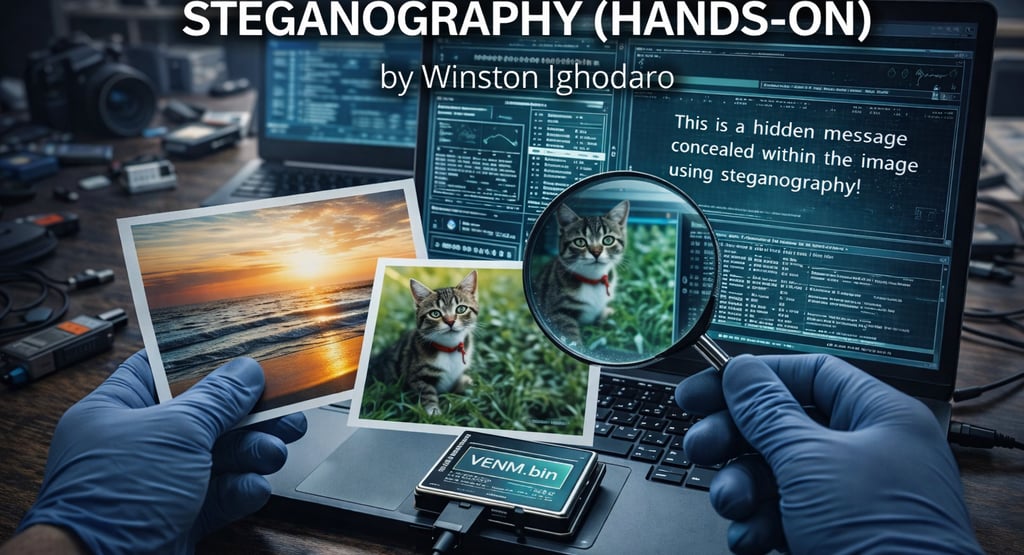
Steganography (Hands On)
Hiding Information in Plain Sight and Learning How to Detect It
ARTICLES

When people hear the word steganography, they usually think of secret spy tricks or movie scenes where messages are hidden inside pictures. That idea isn’t wrong, but it’s incomplete. Steganography is not about encrypting information. It’s about hiding the existence of information so nobody thinks to look for it.
In real investigations, steganography shows up in malware campaigns, insider threats, data leaks, and even simple challenges used to test awareness. The danger is not that the data is hidden. The danger is that it looks completely normal.
This walkthrough explains steganography by doing it hands-on, while also showing how investigators recognize when something isn’t as innocent as it looks.
STARTING WITH THE RIGHT MINDSET
Before touching any tools, it’s important to understand this clearly. A normal image, audio file, or document can carry extra information without changing how it looks or behaves to the average user.
If you open the file, it looks fine.
If you view it, it looks fine.
If you send it, nobody notices anything unusual.
That’s the entire point.
STEP 1: STARTING WITH A NORMAL IMAGE
We begin with a completely ordinary image file. Nothing suspicious about it. This is important, because steganography only works when the carrier file blends in.

This image opens normally. Nothing about the size or name raises suspicion. This is exactly the kind of file that would pass through email, chat apps, or file uploads without attention.
STEP 2: ASKING A SIMPLE QUESTION
Before assuming anything is hidden, investigators start with a simple question. Does this file behave like a normal image?
So the first thing done is checking the file type.


So far, nothing looks wrong. This is where many people stop. In forensics, this is where the work actually begins.
STEP 3: CHECKING THE IMAGE FOR EXTRA DATA
A common steganography trick is appending hidden data to the end of a file. The image still displays correctly, but extra information lives beyond what the viewer normally reads.
One quick way to look for this is with a hex-level inspection tool.
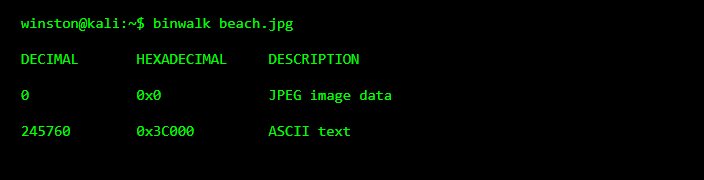
This is the first red flag. A normal image should not contain large blocks of readable text data. The image still opens fine, but something extra is clearly attached.
STEP 4: EXTRACTING WHAT DOESN’T BELONG
At this point, we’re not breaking anything. We’re just separating what belongs from what doesn’t.

This doesn’t damage the image. It simply pulls out the hidden content for inspection.
STEP 5: READING THE HIDDEN MESSAGE
Now we inspect what was extracted.

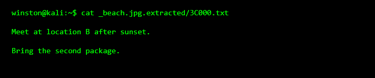
This is a textbook steganography example. The image looked harmless, but it carried instructions that were never meant to be obvious.
WHY THIS WORKS SO WELL
Steganography works because people trust files they recognize. Images, videos, and music files are rarely inspected deeply. They are shared freely and stored everywhere.
This makes them perfect carriers.
STEP 6: STEGANOGRAPHY IS NOT ALWAYS TEXT
Hidden data is not always readable text. It could be another image, a compressed archive, configuration files, or even malware components.
That’s why investigators don’t stop after one extraction. They keep checking until nothing unexpected remains.